

Webhooks
On this page
Developer → Webhooks. Register the HTTPS endpoints Self posts events to. For the delivery model, signatures, retries, and payloads, see the Webhooks section.
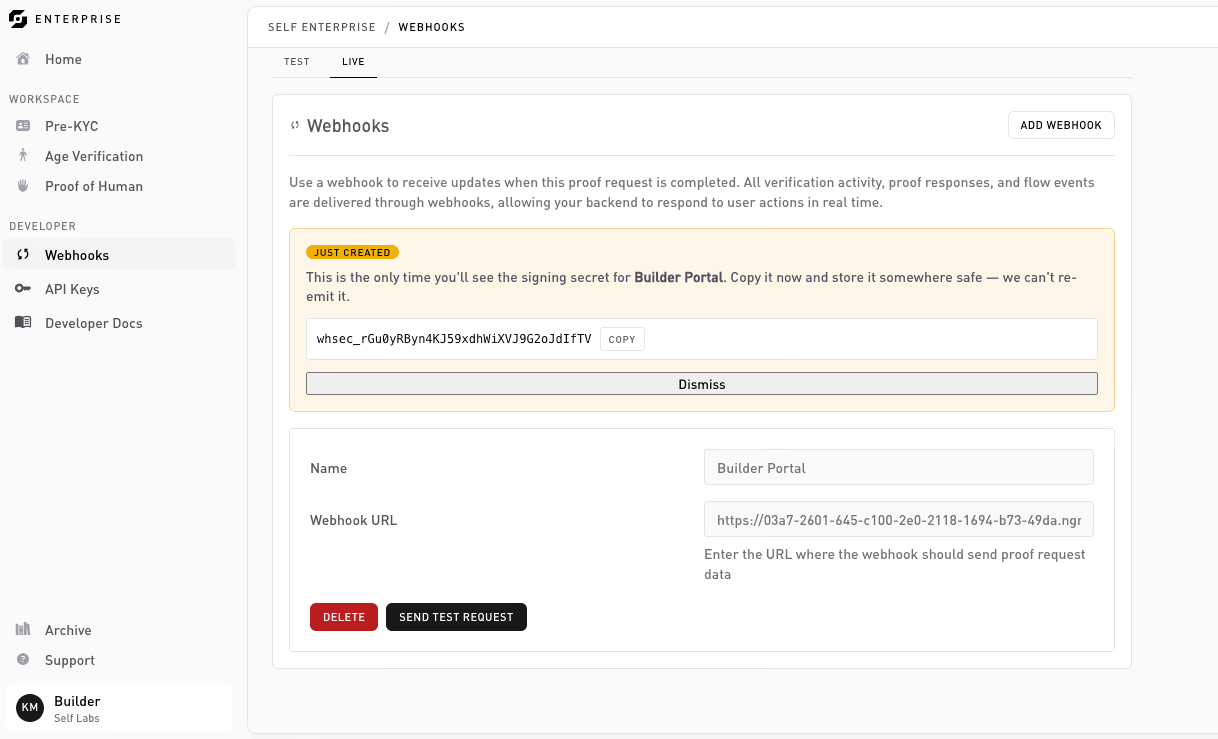
Add an endpoint
First pick the environment with the Test | Live tab strip at the top of the page; the endpoint you create is stamped with the selected environment. Then click Add webhook and fill in:
- Webhook URL (required): the full public HTTPS URL including your handler’s path, e.g.
https://yourapp.com/webhooks/self, not just the domain. - Name (optional): a label for the endpoint.
Click Save. The endpoint is saved right away and the signing secret (whsec_...) is revealed once in a banner. This is the only time you’ll see it, copy it into your secret manager as SELF_WEBHOOK_SECRET.
Every endpoint receives the verification.completed event; there’s no per-endpoint event picker. Branch on event.type in your handler. See the event catalog.
Verify the signature
Once you have the whsec_... secret, wire up real signature verification so you only act on genuine events. See Verify webhooks.
Send a test request
A saved endpoint has a Send Test Request button. It delivers a sample event to your URL and reports whether the endpoint accepted it (returned 2xx). It’s repeatable, use it to confirm your handler is reachable and responding before you rely on live traffic. Sending a test is optional and never required to save an endpoint.
Related
- Webhooks: overview: delivery, retries, and idempotency.
- Verify webhooks: how to validate a delivery.
- Event catalog: every event and its payload.
Thanks — what went wrong?
Thanks for your feedback!